

HubSpot - Building a Workflow

Basics
First, name your workflow. You won’t be able to save it later if this field is empty.
Target
Select the Connection for this workflow, then choose the Object you'd like the workflow to affect and the widget to appear on.

Learn here how to add a new connection.
Context
Open a record from the object you selected, then click the Load Context button.
This will pull in information from the current record, allowing you to enrich and map the data.

Enrichment
Use an external service to fetch additional data based on the provided context. Enter a URL that will receive a POST request with the current context each time the widget loads (according to the settings you’ve entered).
In this example, we're using Make.com as the enrichment endpoint to retrieve matching open positions from Google Sheets, based on the contact's job title.


Click on the Load Enrichment button to trigger the enrichment endpoint.

Widget
Sections
Each grey box in the widget represents a Section, capable of displaying data, linking to external pages, opening iframes, or triggering webhooks.

Sections displayed in Portal widget within HubSpot.
General
Mapping
When you click on a mappable field, a dropdown will appear with all available data tokens (indicated by a $ symbol). You can also enter static text instead of using tokens.

Iteration
If you want to display a varied number of sections, you can use a section iterator with an array. The widget will create a section for each item in the array, allowing for flexible content display.
In iteration mode, you can use index tokens like [*] to represent data for each item in an array. For example, $.enriched.jobs[*].companyName accesses the company name for each job in the array.

Identifier
This field is used later in the Actions context and serves to identify the section.
If not provided, a sequential number will be generated automatically.
Title & Link
The title of the section, can be used as a new window link as well
Fields
The data displayed in the widget as key: value pairs can be of the following types:
- String - Free text.
- Numeric - Numbers will be formatted according to the user's locale.
- Currency - Displays currency values. Supports ISO 4217 currency codes, either mapped or selected from a dropdown.
- Link - Opens a URL in a new window.
- Date - Must be in the format
yyyy-mm-ddand will be displayed in a date format appropriate to the user's locale. - Date Time - Provided as milliseconds since epoch and will be displayed in a format based on the user's locale.
- Email - Displayed as a
mailto:link. - Status - Shown as a colored status indicator. Different statuses can be mapped or selected via a dropdown.
- DEFAULT: Grey
- SUCCESS: Green
- WARNING: Yellow
- DANGER: Red
- INFO: Blue

Actions
Actions enable users to interact with processes either through an iframe, which can display external content or forms within the widget, or a webhook, which triggers external systems or services.

Webhook
A webhook allows you to send an HTTP request to a specified URL using a selected method (e.g., GET, POST).
You can also set a customizable confirmation modal before the request is sent.
Iframe
Opens a pop-up window embedding an iframe with the specified URL. You can also adjust the window size.
Global Actions
The same actions can be set as global actions, meaning they are not tied to any specific section.
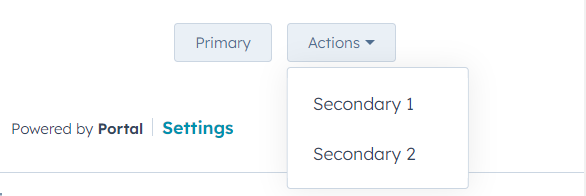
- Primary - Only one primary action is allowed and supports all action types.
- Secondary - You can add as many secondary actions as needed, with support for all action types.
- Settings - Limited to one, and only supports iframe actions.
Preview
Displays a preview of how the widget will appear in HubSpot.
